2023-03-02 updates
- I’ve changed the theme, now I use Ghostwriter.
I’ve been thinking about creating a blog using Hugo for a while. Hugo is a powerful static site generator that allows you to convert a bunch of Markdown files into a nice static website.
I wanted to use Hugo because of its extensibility, large community, and the simplicity with which it allows you to write new posts with the approach WYSIWYM. I also wanted to be able to have a quick contents-update workflow, which is why I set up continuous builds via a GitHub Actions pipeline that, on its end, publishes the built website to Netlify on each new commit.
Why Netlify?
At first, I published this website to an S3 bucket, set up the AWS CloudFront service to deliver contents via a CDN and make my custom domain point to it. It was a nice setup but it was more complicated and “costly” than Netlify. My concern was not exactly the monthly costs (a few cents), but instead what would happen if I forgot to update my credit card once it expired (something that it is very likely to happen in a few years from now!).
So, I decided for Netlify, achieving a simpler and more intuitive setup still using a great and reliable static hosting service.
Create a Hugo Website
Getting Started
Hugo documentation is a good place for when you want to go deeper into the details. I, however, found it a bit dispersive and not too friendly to newcomers like me. In this article, I want to report my setup process and also explain the reasons for some of the choices I made along the way.
But… first thing first! We need to install Hugo! Native installations are a good way to go. However, I prefer to use Docker when possible. There exists a docker-hugo container that has Hugo installed and it’s ready to be used.
Initialization
To initialize the website:
docker run --rm -it \
  -u $(id -u):$(id -g) \
  -v $(pwd):/src \
  klakegg/hugo:0.93.2 new site <site-name> -f yml
The -f yml option at the end specifies to use the YML format for the Hugo config file (this is a suggestion from the theme).
Great! The website is ready but… we find ourselves without a theme.
Installing the Theme
The Hugo theme gallery offers a wide range of themes.
My suggestion is to choose the template first, look at its documentation, and then and only then initialize your website. It’s important to read the theme installation procedure carefully since it might differ a bit from the Hugo official documentation. It was for this reason that my initialization did not exactly work the way I wanted it to at first and I had to initialize the website a few times.
I decided to go with the PaperMod theme: which is not only a compromise between features, simplicity, support, and extendibility but also, it’s good looking!
I’ve followed the PaperMod installation doc and from that, I’ve discovered there are multiple ways in which you can install a Hugo theme.
- Manually download source code from GitHub, and place it into the project’s themes folder.
- Do a regular clone of the theme repo into the themes folder. or
- Use git submodules to add the theme as a dependency of your project.
Method 1 is good for its simplicity, but it has a drawback. When you manually download the theme code from Github to the theme folder of your repo, you end up saving all the theme code into your git repo. What this means is that when you update the theme you have to manually re-download the new version, overwrite files into the theme folder, and once again commit all the theme’s changes to your repository. Even though the first step is very simple, maintenance is not very convenient or “clean”, at least not in my opinion.
Method 2 is the one I personally recommend the least. You clone the theme git clone https://github.com/<theme-project-url> themes/<theme> --depth=1 but then you are in trouble with your git repo. As soon as you do a commit, git will complain by warning you that there is “another git repository inside your current repository”. In fairness, this is a fair complaint and if you ignore it and move on with the commit then you’ll end up storing an “orphan submodule” in your repo. To say it simply, git will save just an empty folder, without any content of your theme! When doing a new clone of your project, you’d have to manually clone the theme once again and you would need to make sure to get the right theme version installed… you’ll find yourself trying to remember “what was the version you installed months/years ago?”. Things are likely to end up messy with this method.
Even though you can lead it to “Method 1” by deleting the .git folder of the theme (rm -rf themes/<your-theme>/.git) and then committing theme files to your repo, I still don’t particularly recommend using this method.
Last (and a personal favourite) is Method 3, this is the one I used. It includes the theme repo as a git submodule.
# enter the just-initialized folder
cd <site-name>
# init a git repository
git init .
# let's do an initial commit to keep things organized
git add . && git commit -m 'Initial commit'
# add the submodule to the repo
git submodule add --depth=1 https://github.com/<your-theme-url> themes/<your-theme>

git add . && git commit -m 'Add theme'
Via git submodules, the included git repository behaves exactly by what it is: a git repository! Inside it, you can pull new theme updates by a simple pull or you can checkout the theme version you prefer. Using this method, git stores into your project just a gitlink object (placed at the path of the theme folder). Basically, Method 3 works like Method 2, but it saves all of the information (.gitmodules file) needed to correctly do future clones by cloning the submodule as well.
Just remember that, when you will clone your website repo, an extra option --recurse-submodules is necessary to initialize and update the submodules as well:
git clone --recurse-submodules <your-project-url>

# that's equivalent to:

git clone <your-project-url>
cd <your-project>
git submodule update --init
Theme configuration
Each theme has its own configuration options. It depends on the theme you choose and how you want to tweak its behavior.
In my config.yml file you find the options for this website, that I put together using the PaperMod documentation.
GitHub Actions setup
From the Hugo on Netlify documentation you’ll discover that Netlify integrates very well both with Hugo and GitHub. It first connects to your GitHub account and after a few simple steps, everything works like magic. Netlify pulls your repo at certain intervals, checks for changes and, if any, it rebuilds the Hugo website and finally publishes it.
However, I wanted to make GitHub Actions build the website and push it to Netlify. A “push” approach carried out by GitHub, instead of a “pull” approach carried out by Netlify.
Why did I want this?
- I don’t like the pull approach, mostly because after you do a git push, it makes you wait in order to be able to see the changes online and I like to be able to see them as fast as possible.
- I don’t want to be tied to a specific hosting service. What if I change my mind or Netlify disappears? I want to be able to easily switch to another host.
- I don’t like the magic of Netlify doing everything on its own (Yes,sadly, I’m referring to that convenient and helpful magic!). Personally, I prefer to have more control and be able to finely configure what I want in the build and deployment procedure, which is not super straightforward when relying on the Netlify procedure.
- I don’t want Netlify to access my GitHub account. I have nothing against Netlify in particular but, again, I prefer a push approach. What I mean by this is that I prefer to have GitHub come to Netlify and publish the website, we might call this a “downstream flow direction”.
To setup GitHub Actions, create the file .github/workflows/hugo-netlify.yml in your repo, with the content:
Now, we need to give GitHub permission to access Netlify so that it can push the Hugo website once it’s built. But, before we do this, we need a Netlify website!
Netlify
On Netlify, we need to do a couple of things:
- Generate an authorization token, to let GitHub Actions authenticate and push the code
- Create a Netlify website that hosts the Hugo build result
Generate the Auth Token
- From the avatar icon, top-right corner, go to “User Settings”.
- On the left sidebar, choose “Applications” and then “New Access Token”.
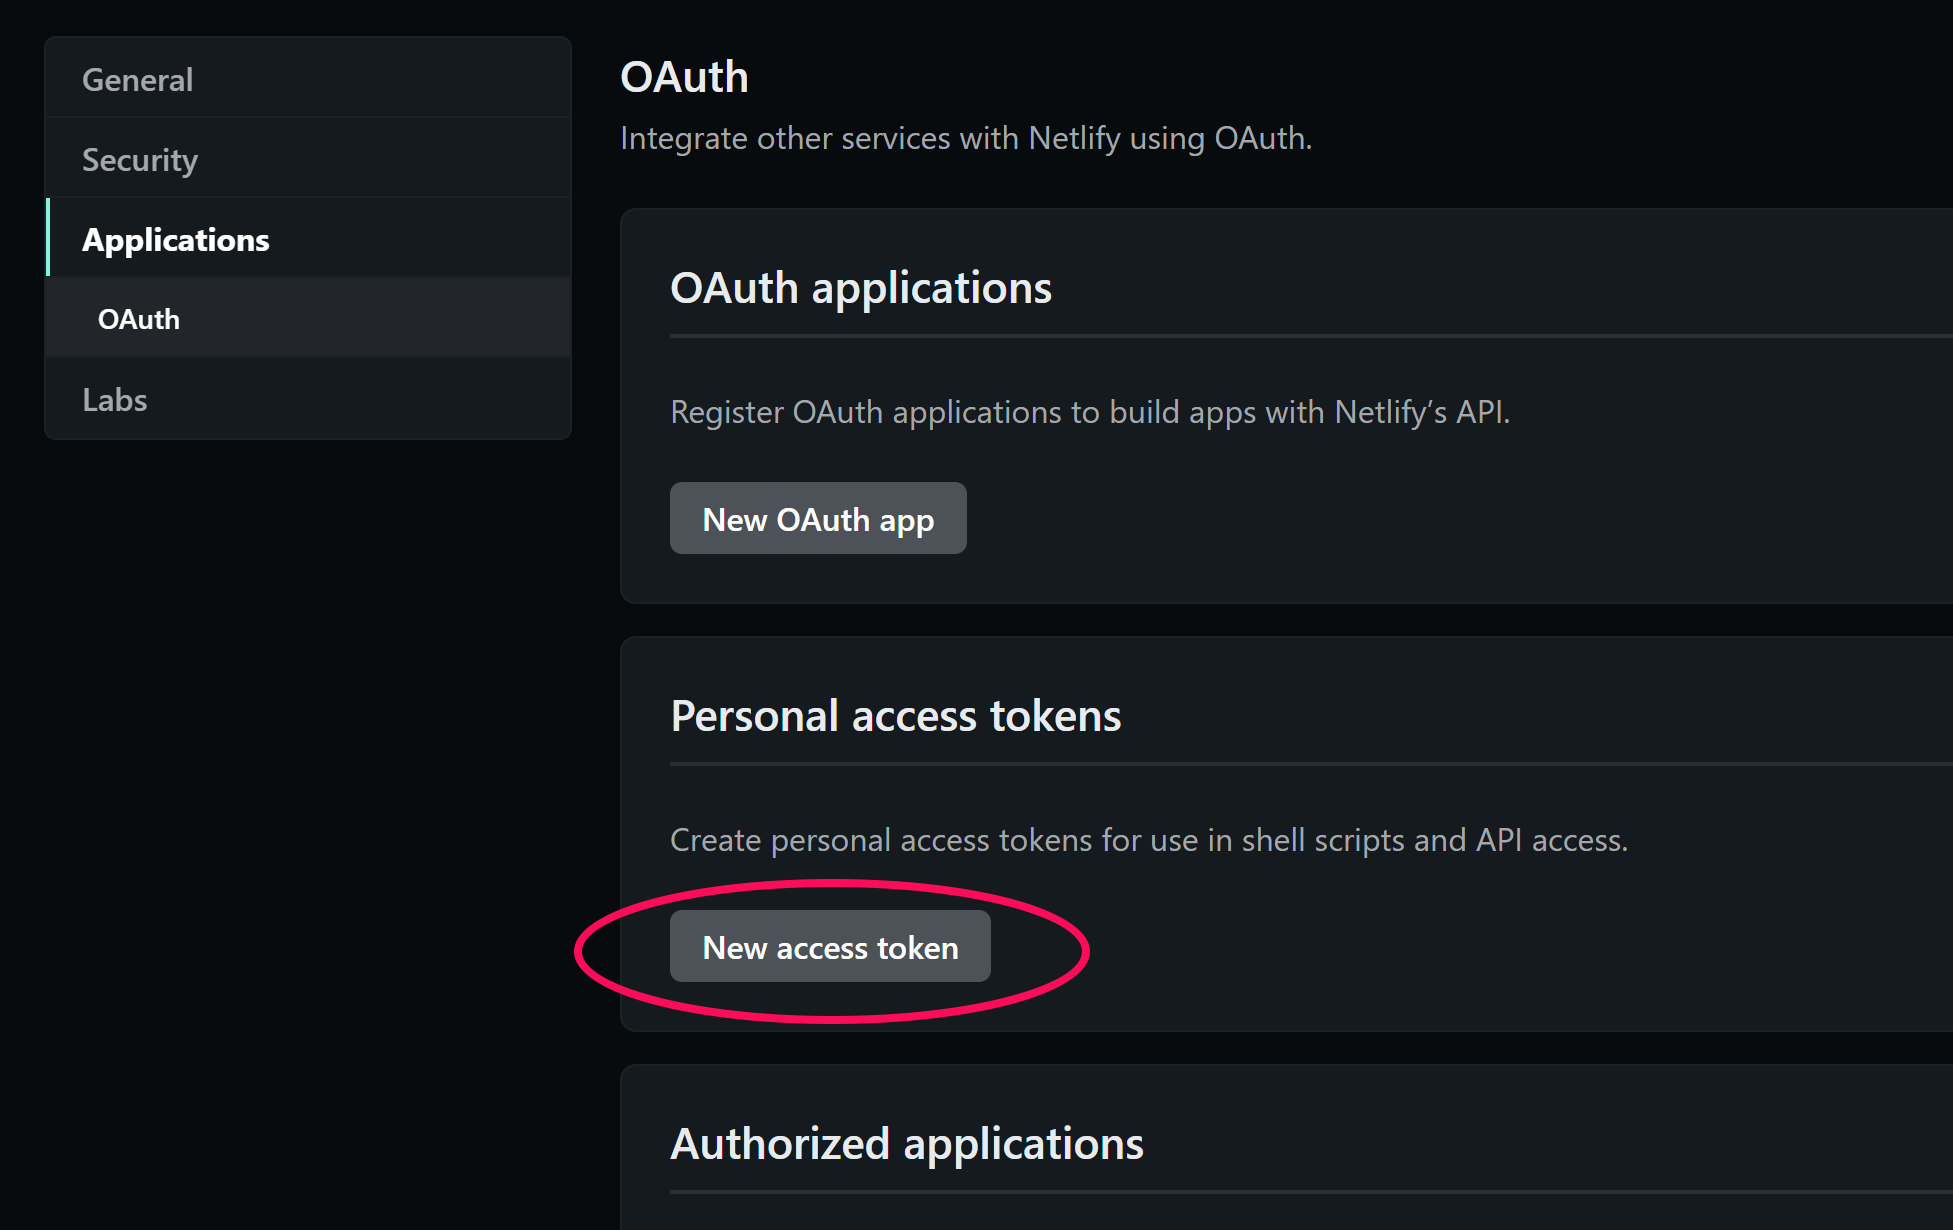
- Choose a name for the token and generate it. I suggest something similar to:
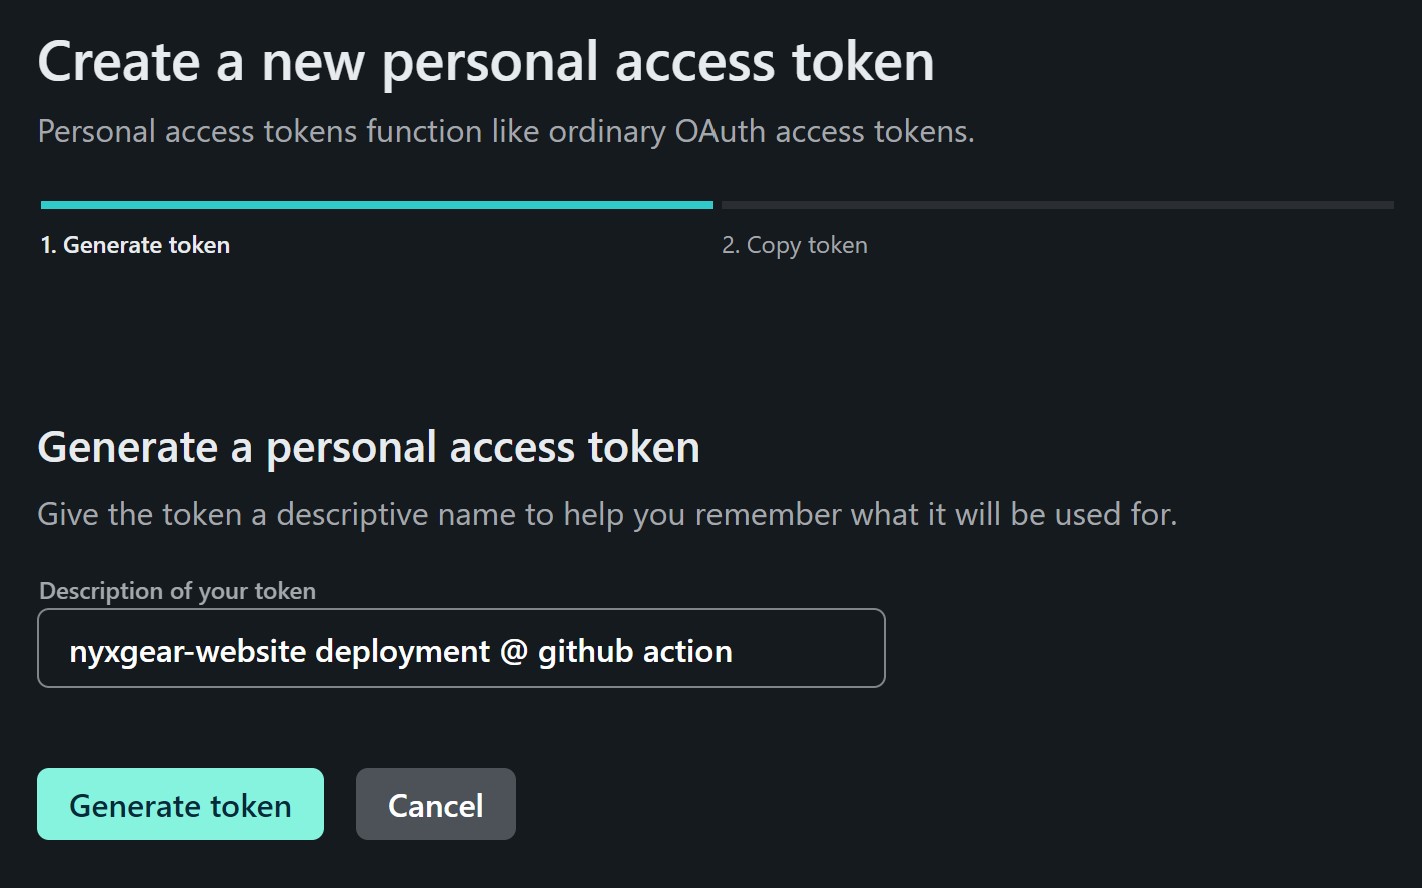
- Keep the generated token aside , we will use it later. Watch out! This string is equivalent to a password and provides access to your Netlify account. Don’t forget it and don’t leave it lying around!
Create a Netlify Website
If you just signed up to Netlify, you need to create what they call a “team”: a group to store your projects/websites.
Once you have created a team, you need to choose the “Add new site” > “Deploy manually” option to create a new site.
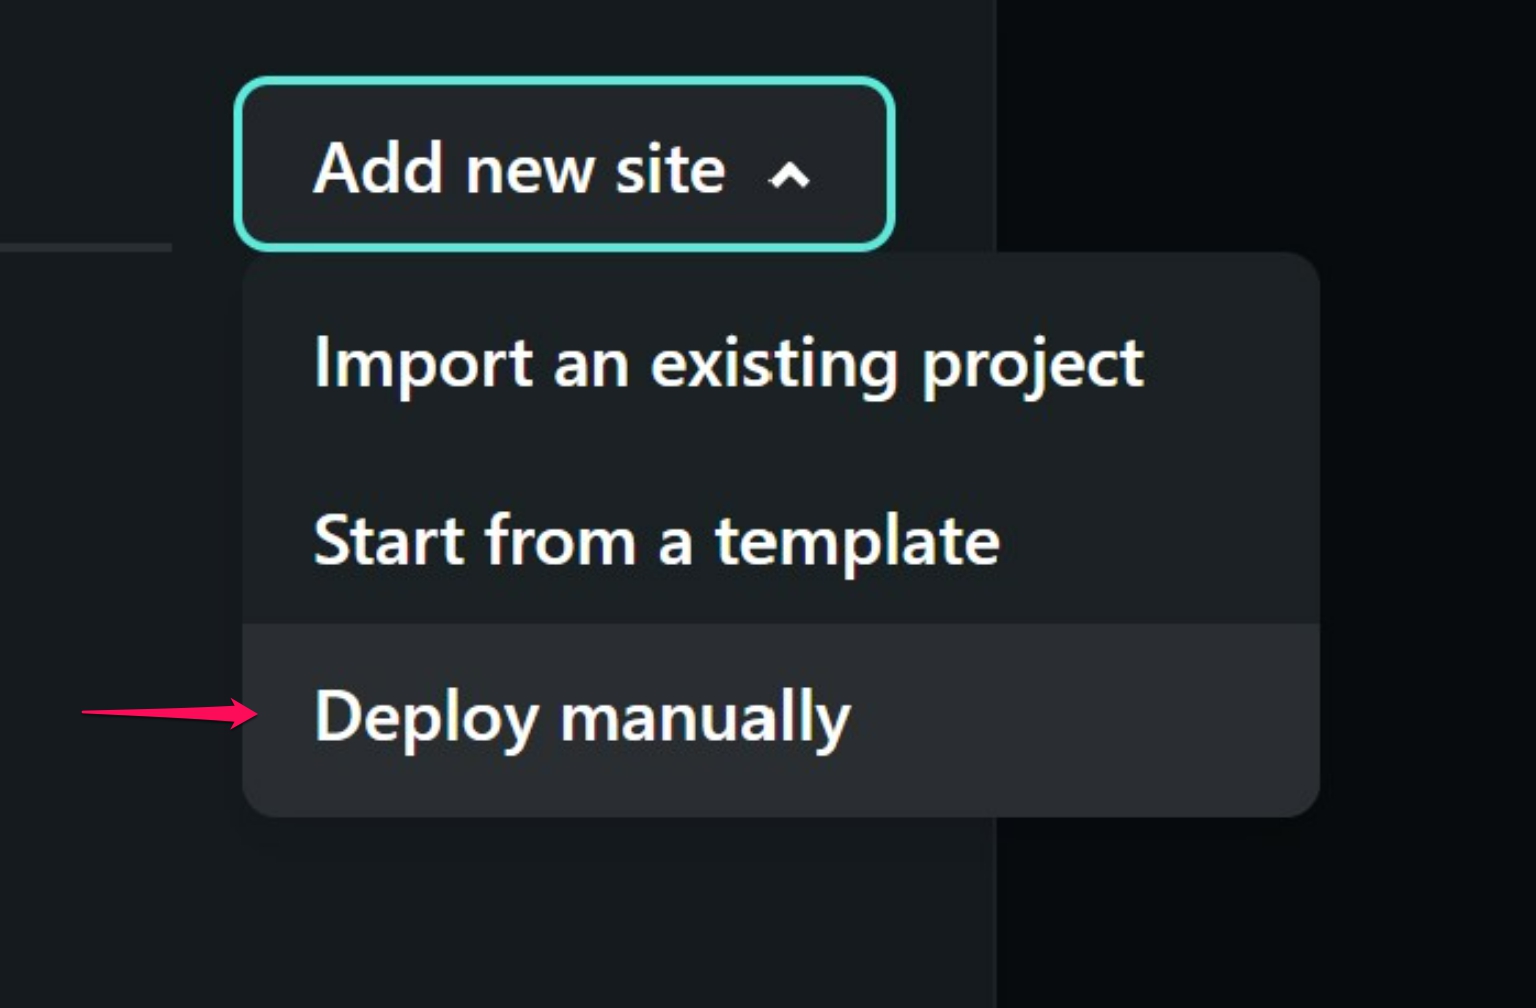
The site creation page will ask you to upload a folder with a website. You can upload a folder with some random content (it will be overwritten later).
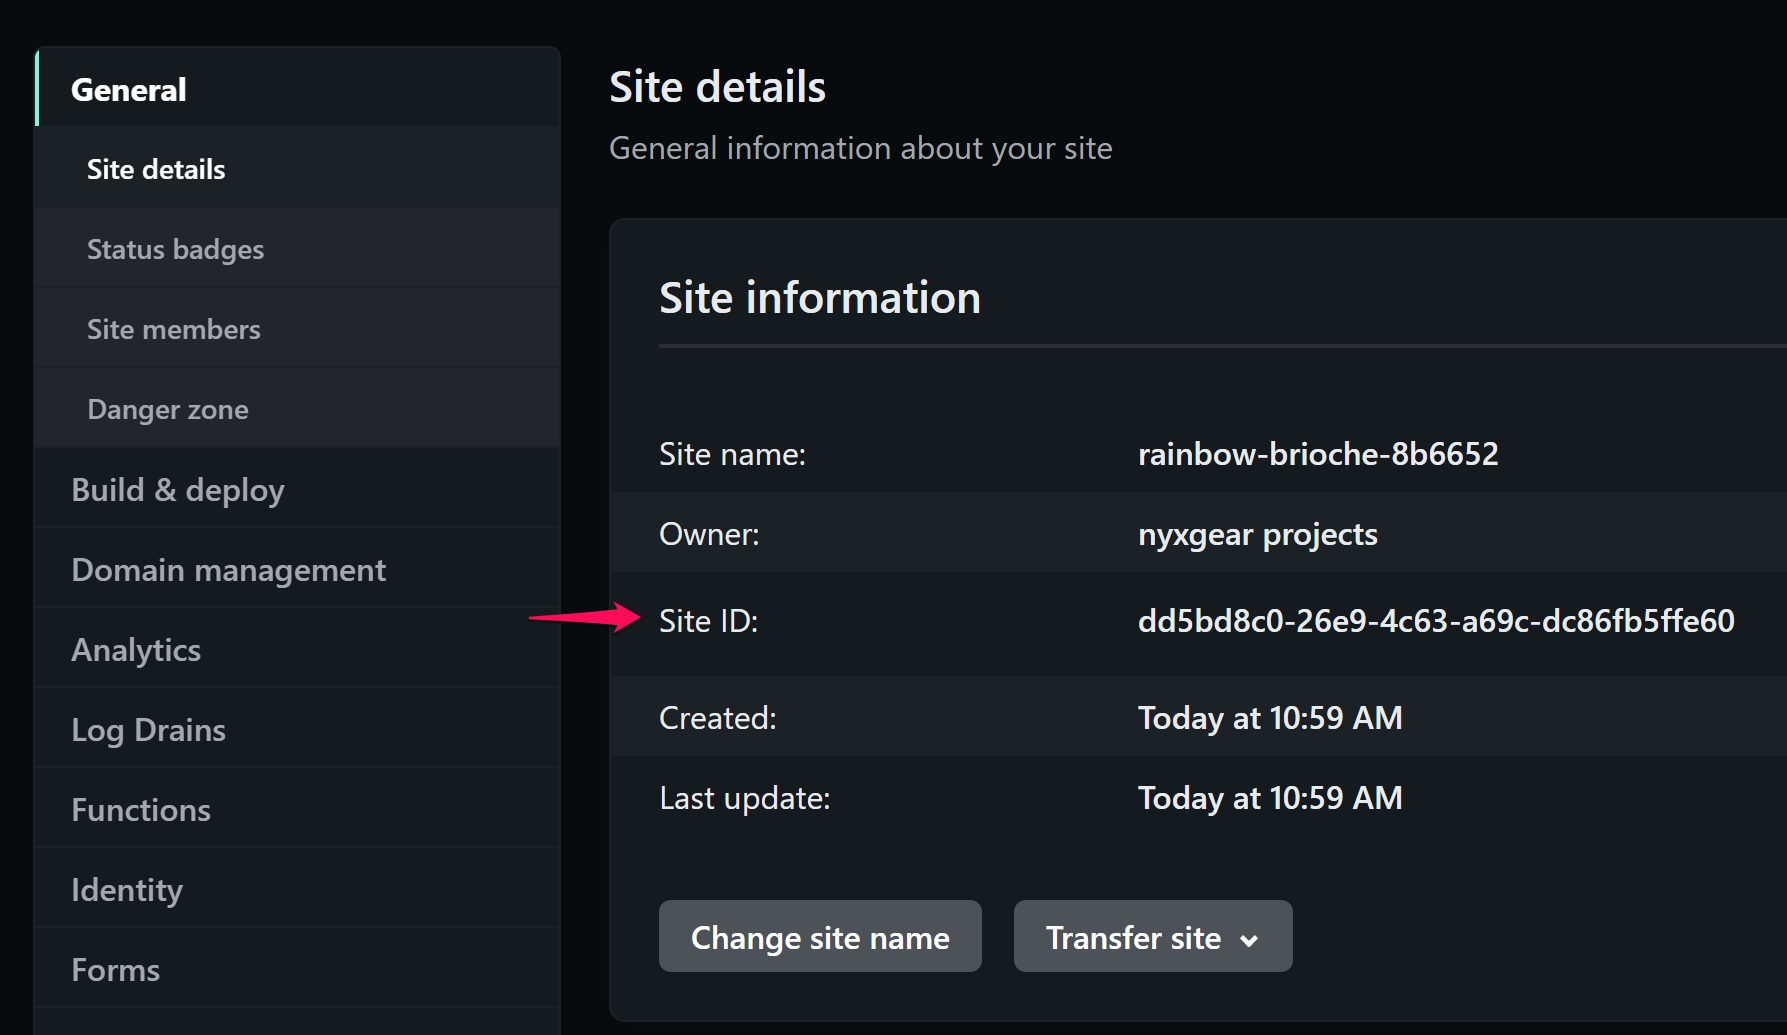
Then, you will have landed on the “Site overview” page, once here, let’s go to “Site settings”:
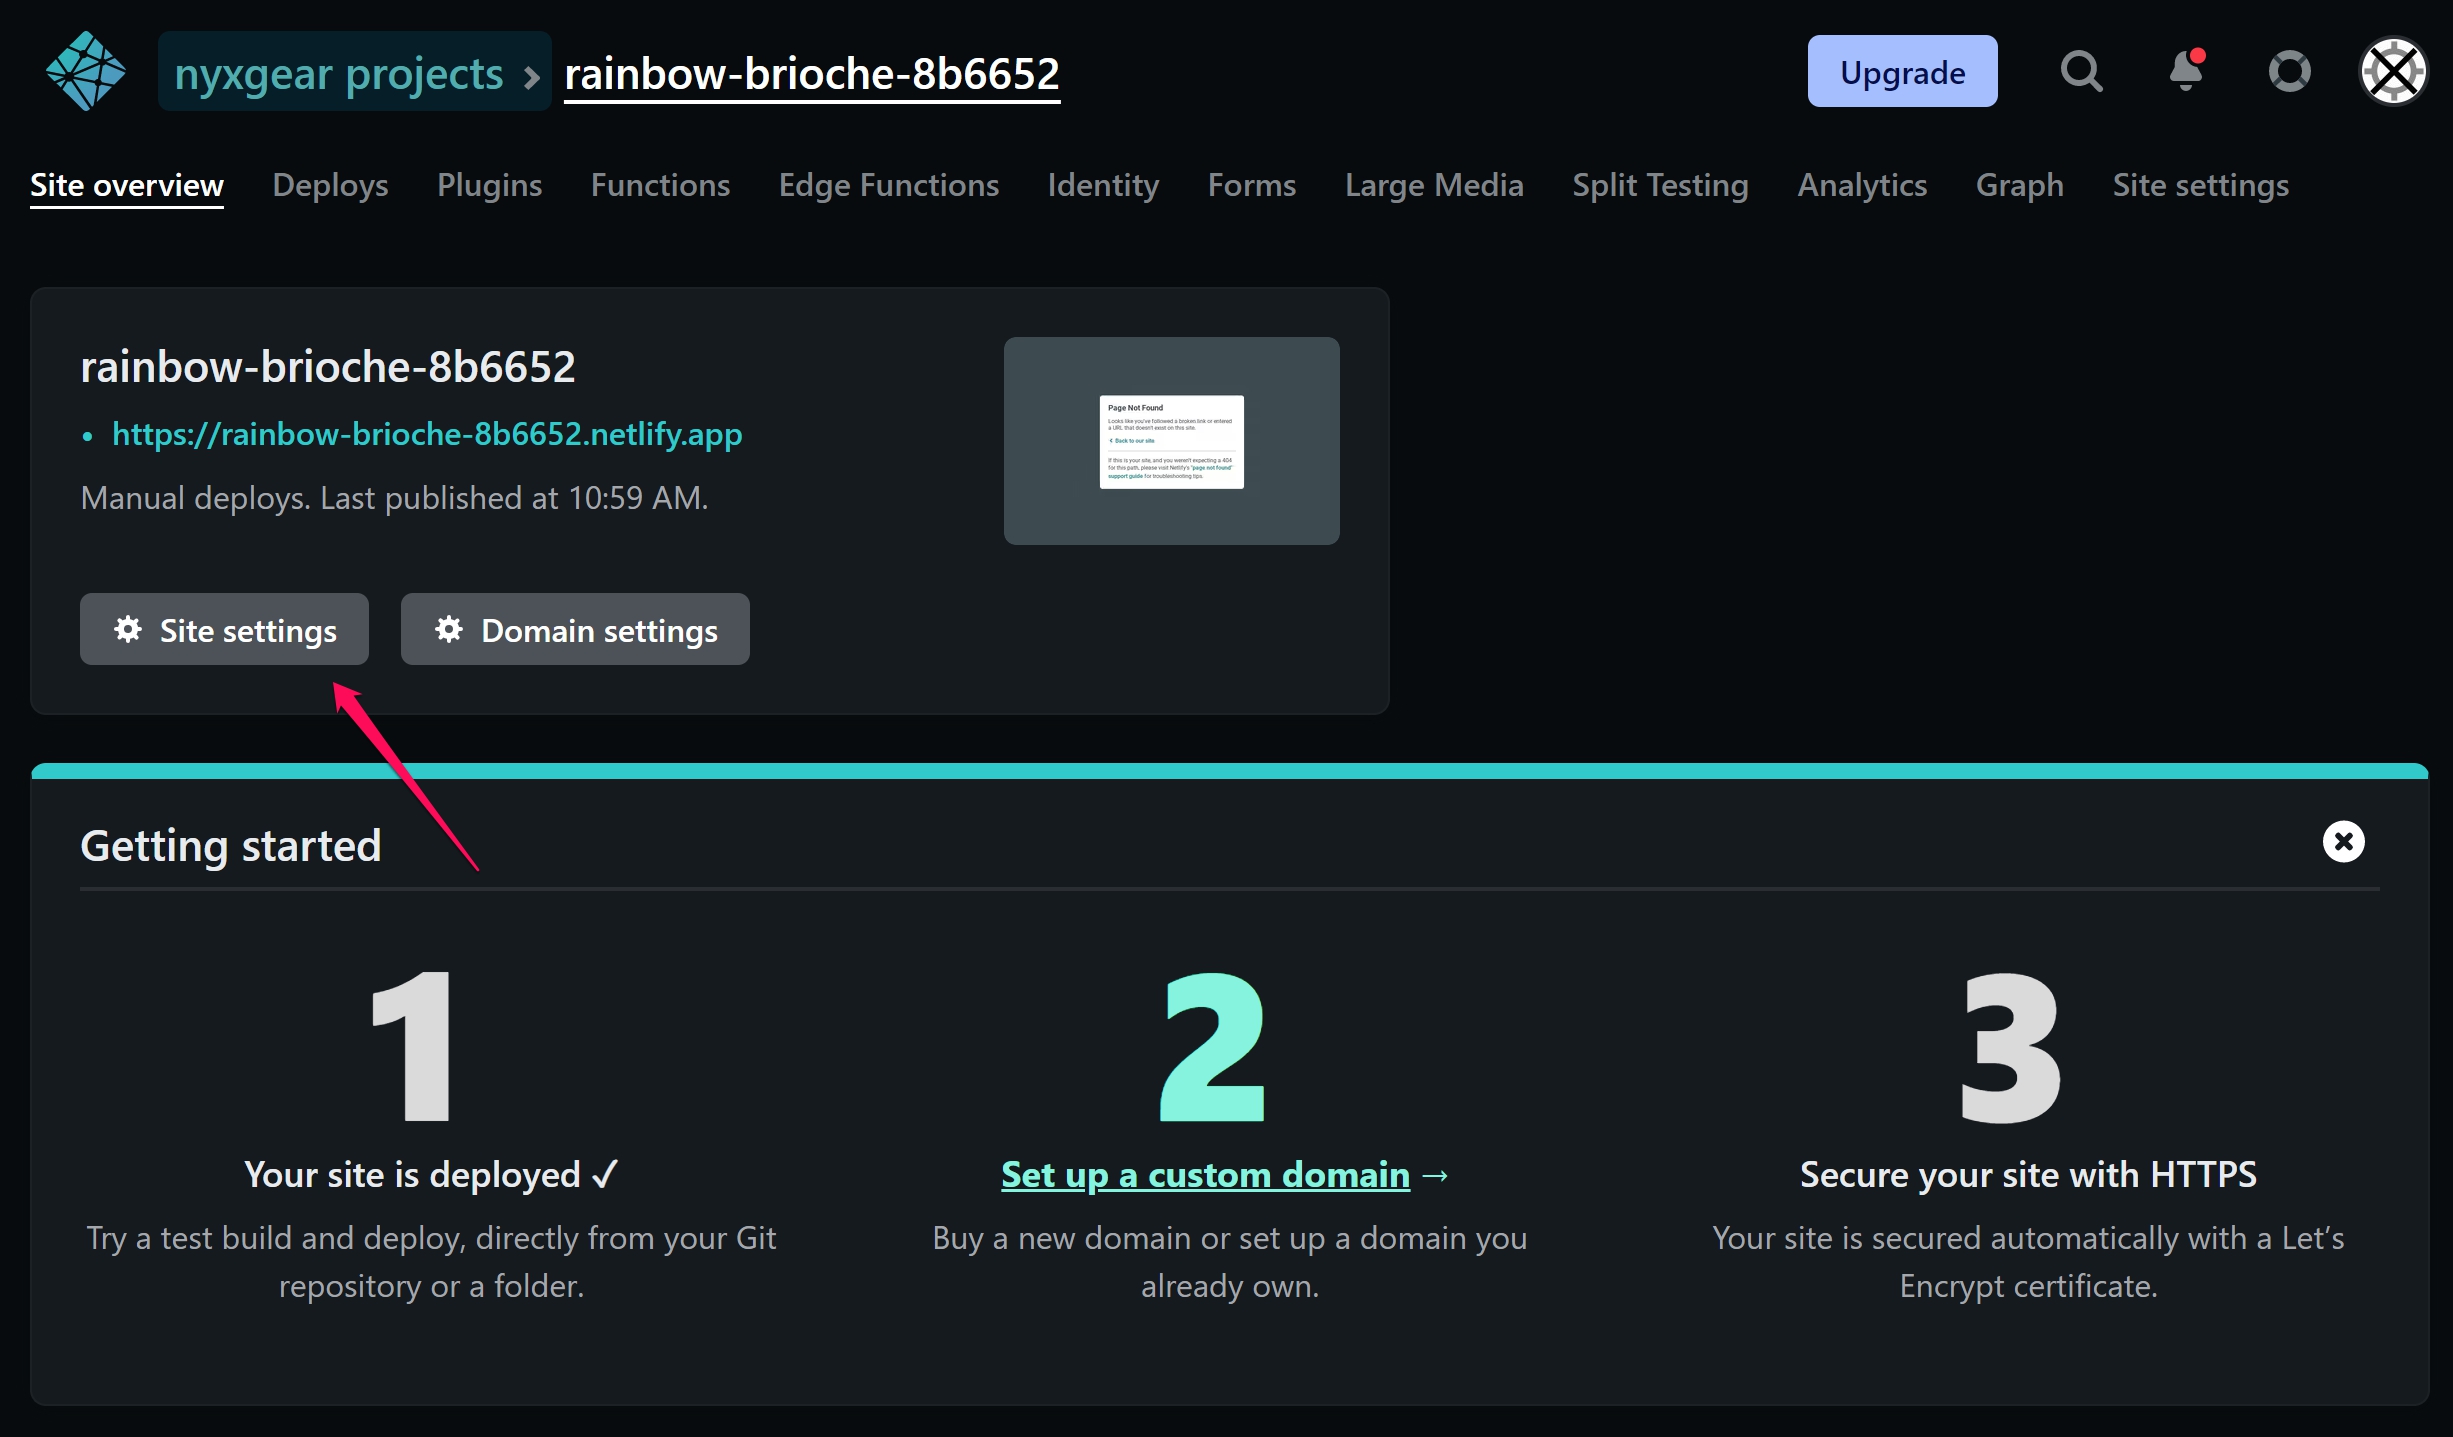
As we did before with the authorization token, note down the “Site ID”, we will use it in a while.
Finishing Up and Testing
What we still have to do:
- configure the auth token and site ID as GitHub secrets
- create and publish the first article
GitHub Secrets Configuration
Secrets allow the secure use of sensitive information (like passwords, access keys, or auth tokens) into GitHub pipelines while also keeping them out of git repositories. It is the best practice to avoid storing secrets in git repos, since even if you delete them later, they’ll still be part of the git history. In which case they would be easily exploitable. Instead, environment variables (under the form of secrets) are injected at pipeline runtime to pass the sensitive information where/when necessary.
Let’s create the secrets that will be used in the pipeline as the variables NETLIFY_AUTH_TOKEN and NETLIFY_SITE_ID. You can see how they are used in the lines 32 and 33 in the .github/workflows/hugo-netlify.yml file we created to configure GitHub Actions.
On the GitHub repository page go to “Settings” > “Secrets” > “Actions”.
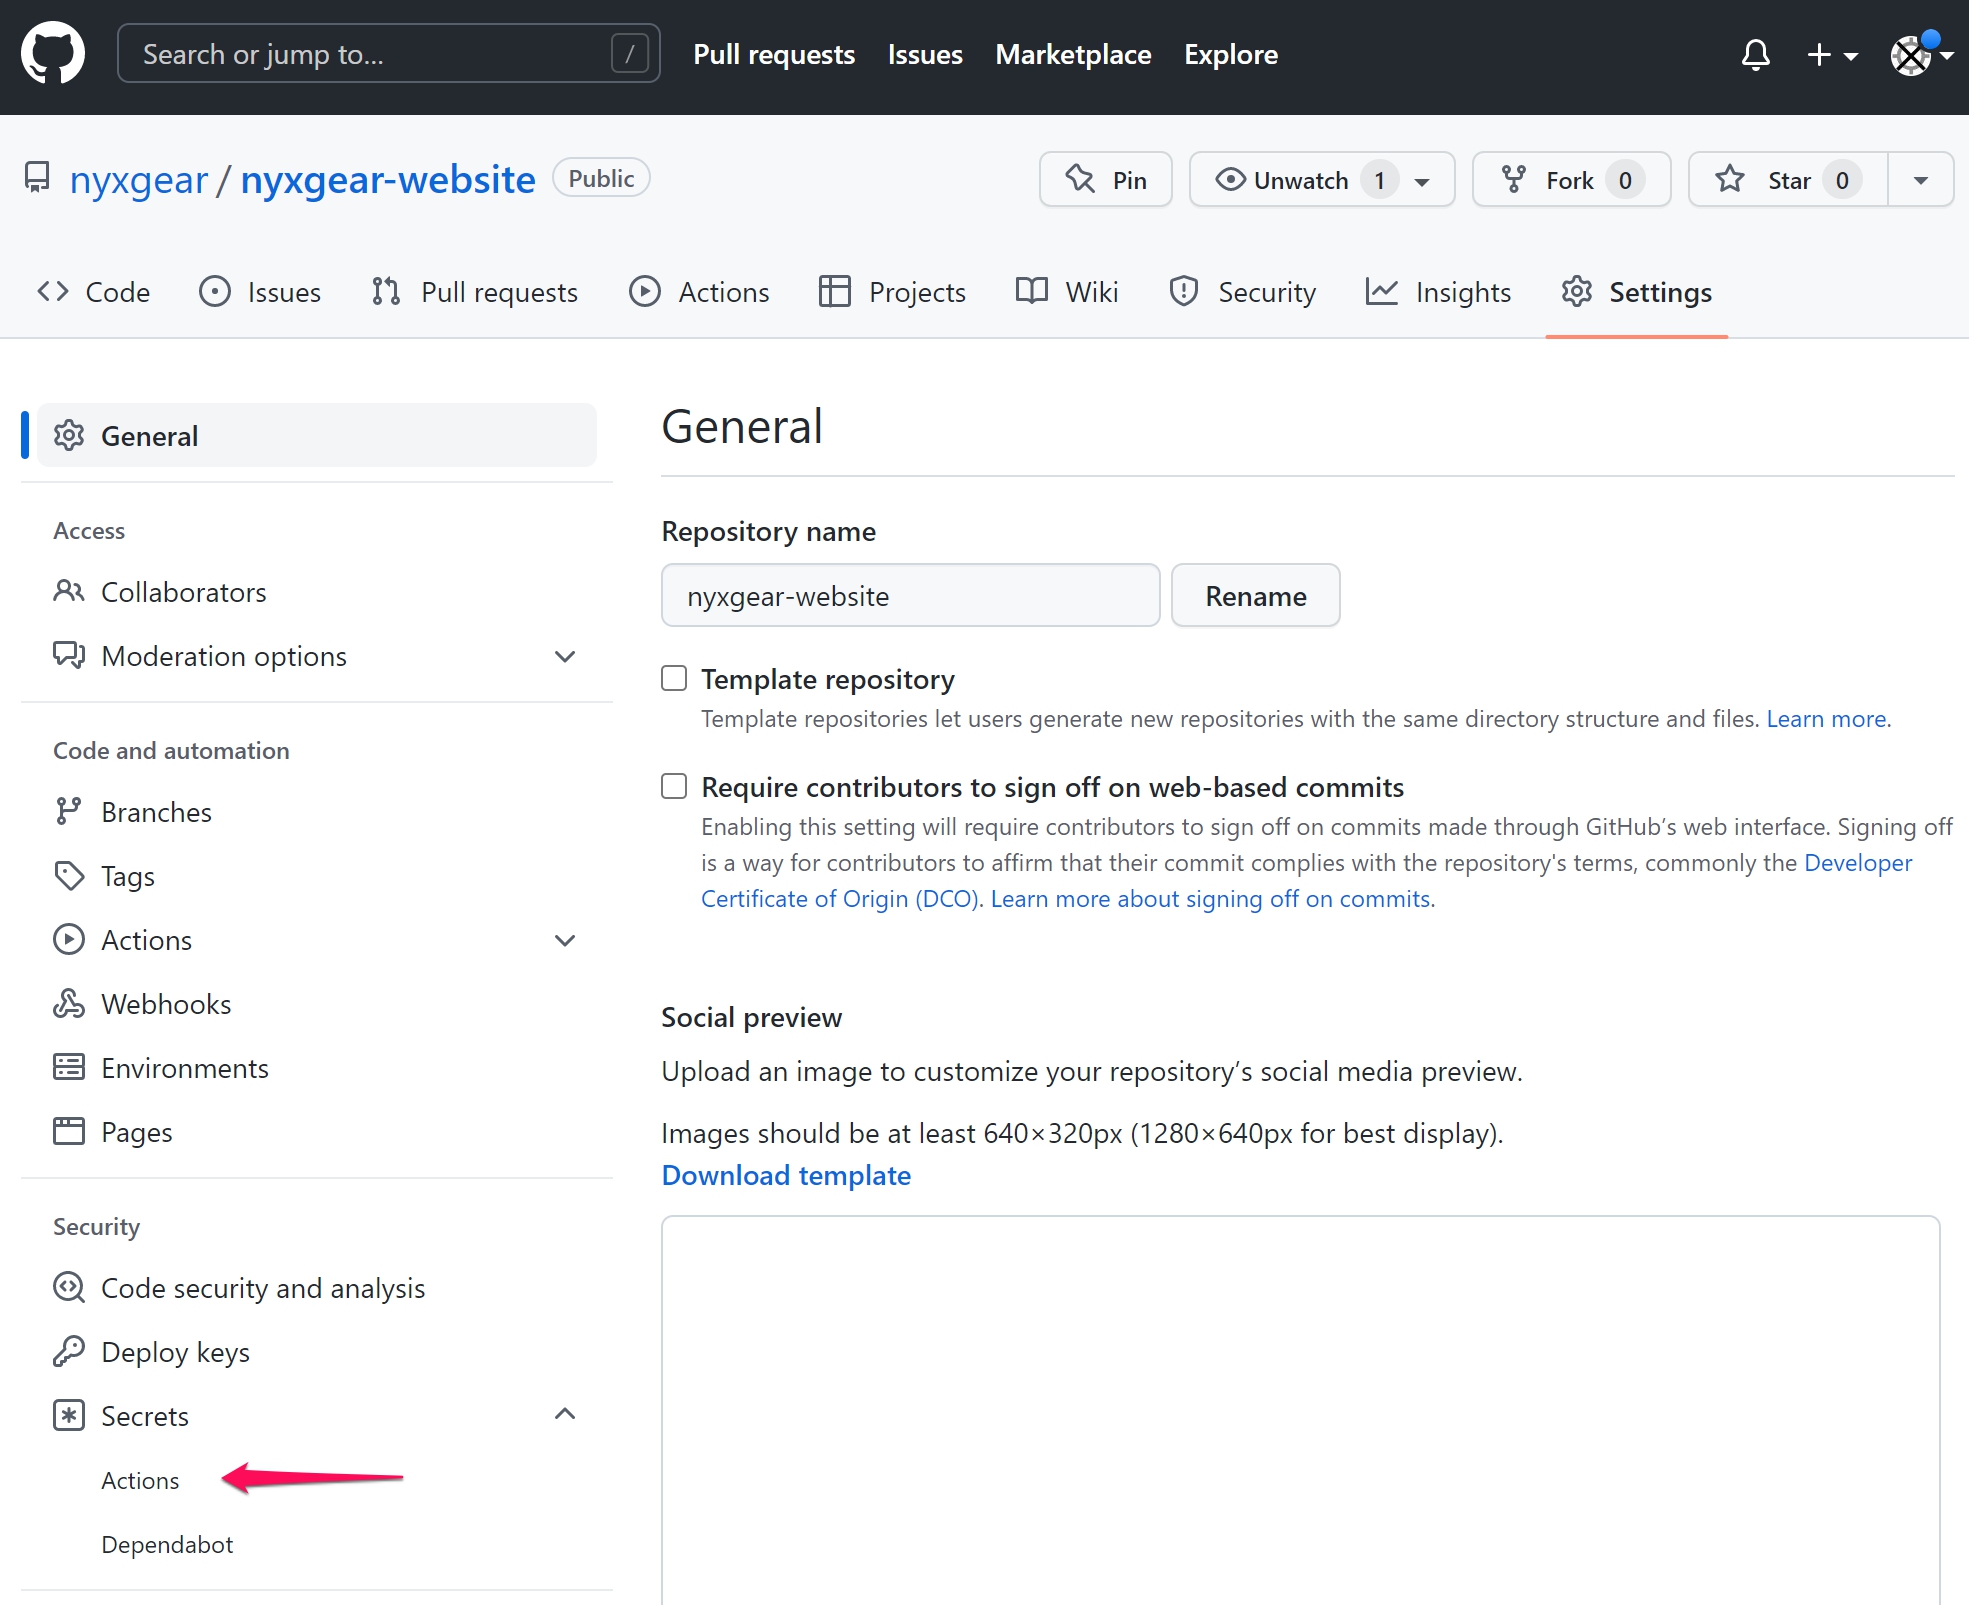
Then, via the “New Repository Secret” button create the 2 secrets we need:
-
Name: NETLIFY_AUTH_TOKEN.
Value: the authorization token we generated before on netlify.
-
Name: NETLIFY_SITE_ID.
Value: site ID.
Done! As soon as the pipeline is triggered with a git push, it will access the secrets, and the stage “Deploy to Netlify” will be able to push the code to the website we created.
First Article Online
It’s time to get that first article online!
Create a new article:
docker run --rm -it \
  -u $(id -u):$(id -g) \
  -v $(pwd):/src \
  klakegg/hugo:0.93.2 new posts/first-post.md
and add your contents to the file content/posts/firs-post.md.
If you want to see a preview start the Hugo server:
docker run --rm -it \
  -u $(id -u):$(id -g) \
  -v $(pwd):/src \
  klakegg/hugo:0.93.2 server
and check the result at http://localhost:1313/.
Good! Let’s publish it… but how?
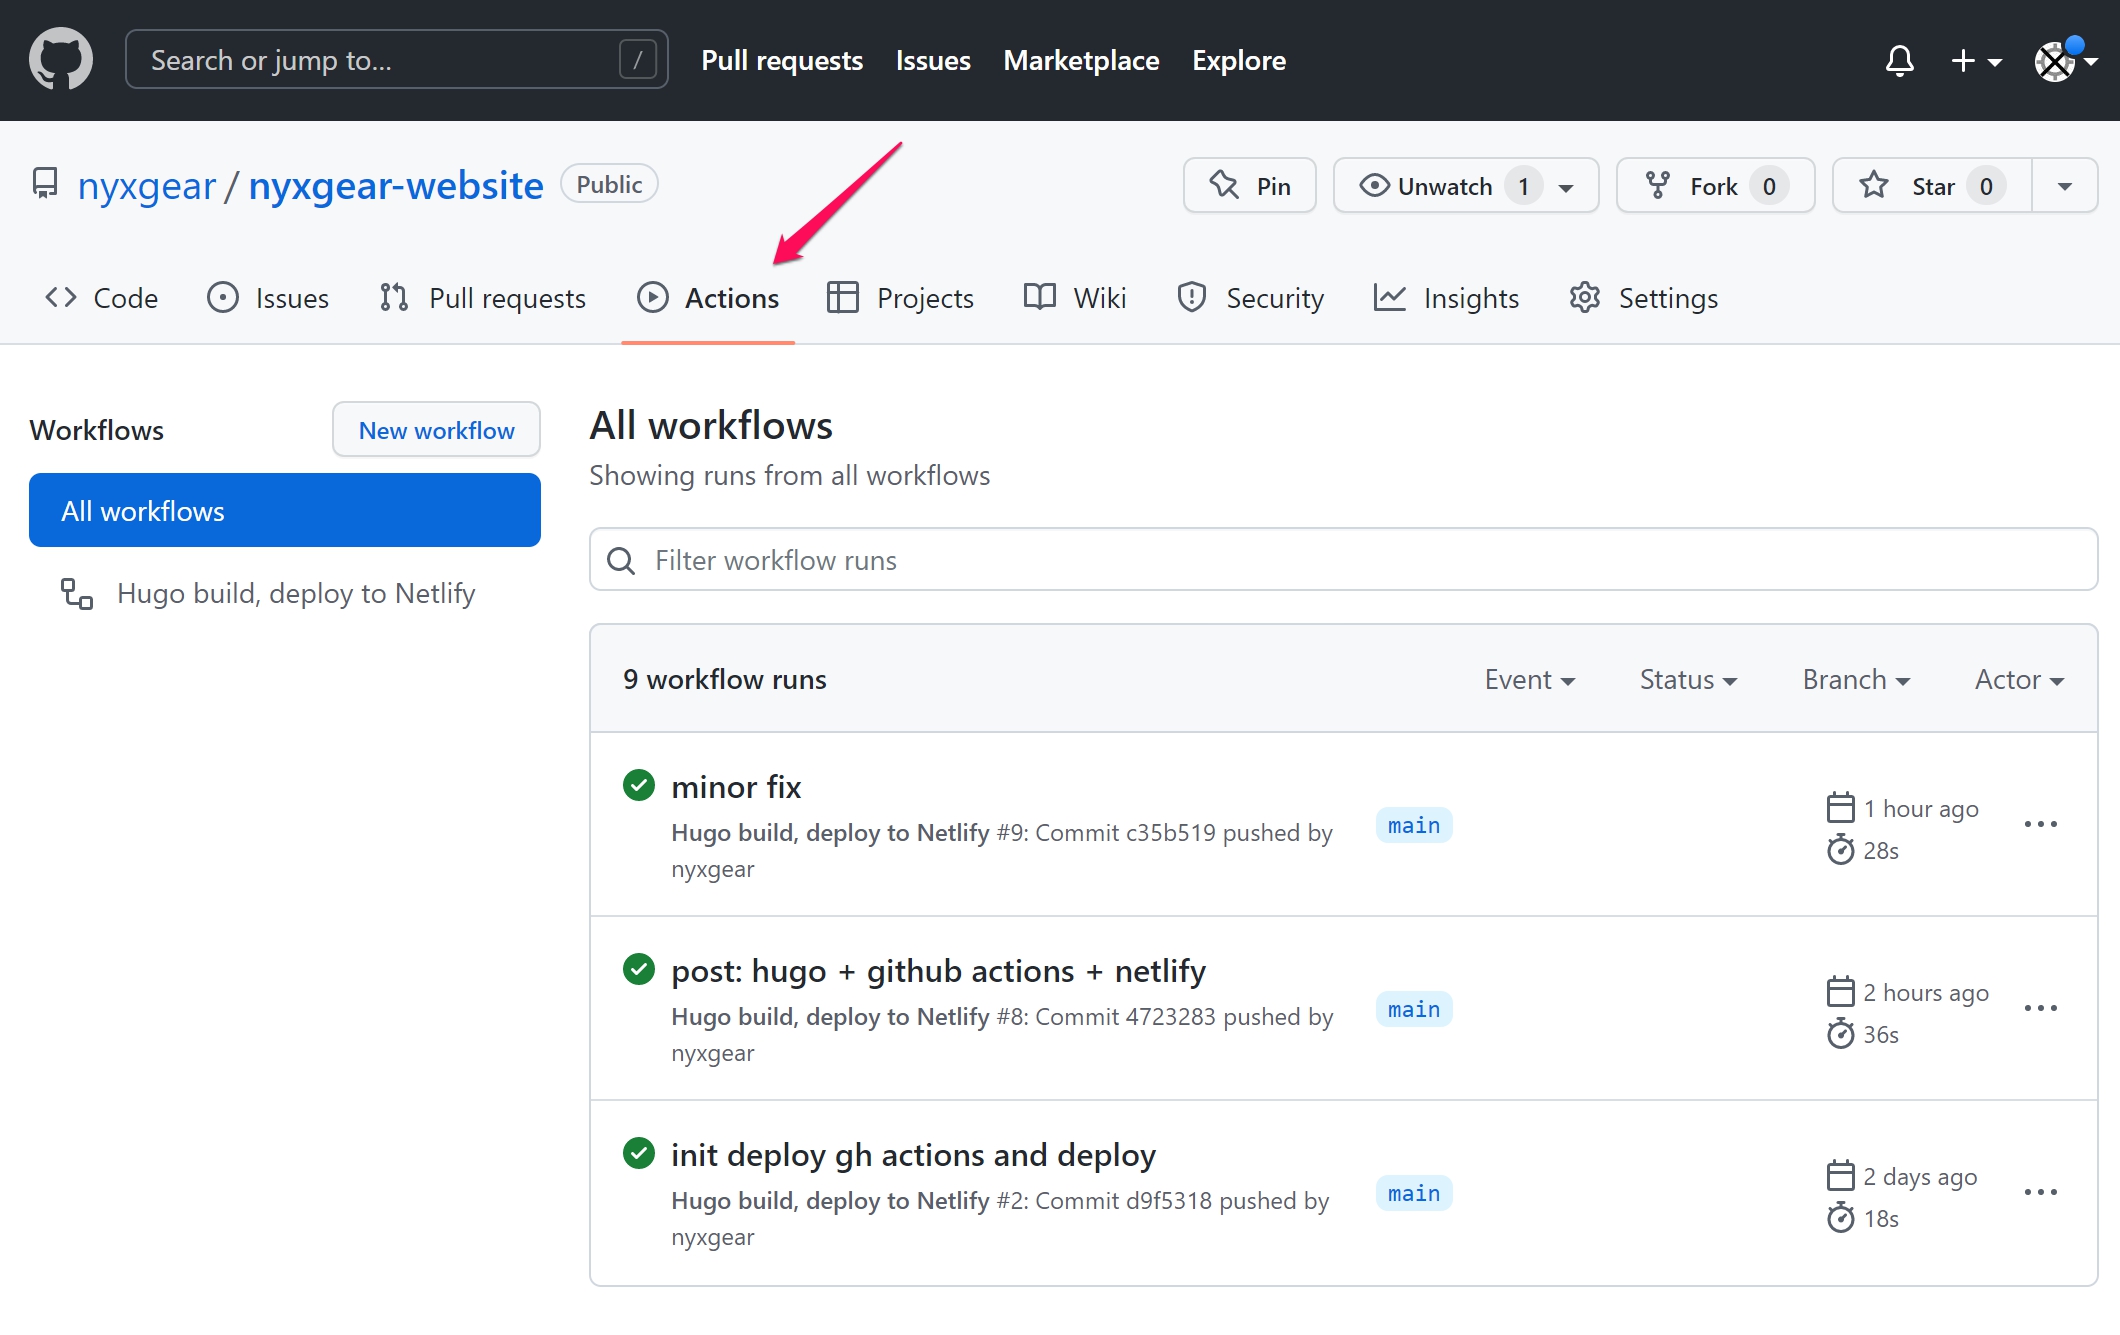
If all the configurations we did up until now are correct, we just need to commit and push! That’s all! (Use branch main - need in pipeline rule)
The GitHub pipeline should start: you build the website and deploy it to Netlify. You can check the runs and logs from the “Actions” menu on GitHub:
On Netlify, from the “Site settings” page, you have the link with which you can currently find the website online. In my case it was: https://rainbow-brioche-8b6652.netlify.app/
One last thing,the icing on the cake: you can map your custom domain (like mywebsite.com) to the Netlify website URL (documentation to setup custom domains) in order to let users access your website via your personalized domain.